


Thinking about building your own custom couch or sectional sofa? Whether you’re looking to save money, create something unique for your space, or just enjoy a rewarding DIY project, building a couch is more achievable than you think.
This guide walks you through the tools, materials, and steps to create a sturdy, stylish, and comfortable sofa, plus a few pro tips from our furniture experts at What A Room.
Table of Contents
Tools You'll Need
Necessary Tools:
Measuring Tape
Carpenter's Square
Pencil
Hammer
Safety Glasses
Hearing Protection
Drill
Circular Saw
Nailer
Sander
Staple Gun
Level
Countersink Drill Bit
Materials & Shopping List
- Softwood Beam (Pine): 30x50mm section OSB
Cardboard: 2 sheets of 16mm 1200x2400mm
Plywood: 1 sheet of 5mm 1200x2400mm, 1 sheet of 15mm 1200x2400mm
Screws, Nails
Foam Rubber: Minimum density of 30 kg/m3, in thicknesses of 20mm and 40mm
Padding Polyester: Density between 140-170 g/dm, some upholstery batting
Wood Glue, Spray Adhesive
Holofiber or Upholstery Batting Chips for Pillow Stuffing
Fabric: 10.2 running meters
Sofa Lifting Mechanism: 1 set
Sofa Legs (50mm height): 9 pieces
Step 1: Build the Arms
Let’s begin with the simpler components - the arms.
Dimensions for an Arm:
Length 900mm, Width 200mm, Height 550mm (600mm with legs). Below is the parts list for a single arm. All measurements are in millimeters.
OSB (Oriented Strand Board):
- 160mm x 875mm: 2 pieces
- 480mm x 875mm: 1 piece
- 300mm x 775mm: 1 piece
Plywood:
- 160mm x 510mm: 2 pieces
- 875mm x 510mm: 1 piece
Rail (30mm x 50mm):
- 875mm: 2 pieces
- 480mm: 3 pieces
Foam Rubber (20mm):
- 510mm x 880mm: 1 piece
- 210mm x 880mm: 1 piece
- 300mm x 100mm: 1 piece
- 200mm x 510mm: 1 piece
Foam Rubber (40mm):
- 900mm x 200mm: 1 piece
Step 2: Construct the Section Frames
Here is the list of parts required to construct the left side of the handcrafted wooden frame. All measurements are in millimeters.
OSB (Oriented Strand Board):
- 1500mm x 245mm: 1 piece
- 295mm x 900mm: 2 pieces (refer to the provided drawing)

-
505mm x 210mm: 2 pieces (as indicated in the drawing)

Cardboard:
- 90 x 1500 mm: 1 piece
- 360 x 1500 mm: 1 piece
- 5mm Thickness: 1500 x 720 mm: 1 piece
- 15mm Thickness: 100 x 130 mm: 2 pieces
Rail (30 x 50):
- Front Rail: 1468 mm: 6 pieces
- Back Upright: 740 mm: 4 pieces
- Back Rail: 150 mm: 2 pieces
- Vertical Backs: 260 mm: 4 pieces
- Front Rail: 1408 mm: 2 pieces
- Side Rail: 690 mm: 2 pieces
- Side Rail: 630 mm: 3 pieces
- For Seat Frame: 200 mm: 4 pieces
- For Underframe: 245 mm: 2 pieces
- For Strengthening of Underframe: 1350 mm: 1 piece
Foam Rubber:
- 20mm Thickness: 1500 x 530 mm: 1 piece
- 100mm Thickness (composed of layers: 2 x 40mm and 20 mm): 1500 x 740 mm: 1 piece
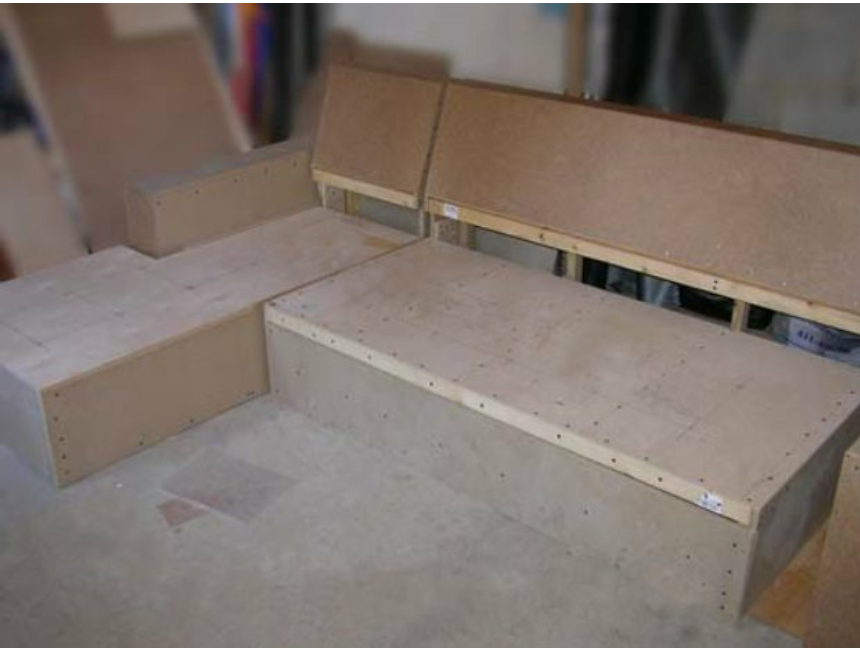
Assembling the Left Side Couch Frame
Attach the first three front rails (1468mm each) to the back post (740mm).
- Use two screws per rail joint and apply glue at each connection point.
- Temporarily secure the front rail with one screw, leaving it without glue for now.

Vertical Beam and Rail Connection: Attach two vertical beam posts (740mm each) together using rails (150mm each).
Ladder Formation: Create a “ladder” structure using rails of 260mm and 1468mm.

Additional Rail Attachments: Affix additional rails (260mm each) to the OSB at the edges for extra support. Ensure screws used are at least 80mm in size.

Fasten the "ladder" securely to the main frame of the sofa.

Frame Inspection: Upon viewing the sofa frame from behind, ensure all parts are securely in place.

Back View


Semi-Product and Frame Assembly: From the rail (1408mm and 200mm), craft two semi-products as depicted in the provided figure.
- Assemble the frame using rails of sizes 690mm (2 pieces) and 630mm (3 pieces).
- During assembly, regularly measure frame diagonals with a tape measure to ensure both diagonals are of equal length.
- Place the assembled framing securely into the frame.

Plywood Attachment: 10. Attach the 5mm plywood using glue and secure it with 25mm screws, spaced no more than 20cm apart.

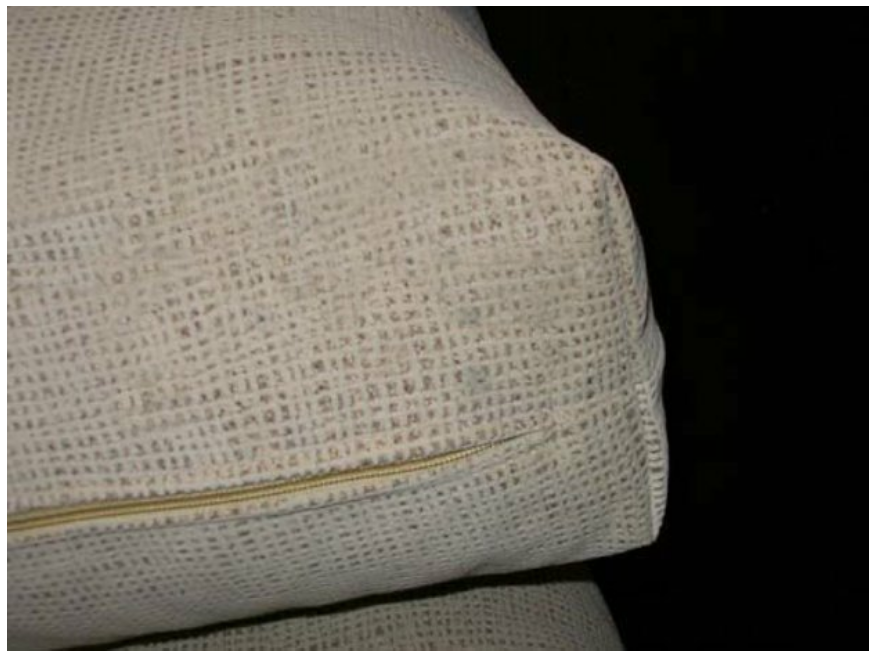
If using dense, almost non-air-permeable fabric for upholstery, create 15-20mm diameter holes in the plywood every 30cm to allow for air release.

We secure the cardboard to the backside using adhesive and large-headed nails (2x25mm).

We begin applying the upholstery batting for stuffing the pillows. Ensure that the top layer of the upholstery batting on the seat, measuring 20mm, is a single, unbroken piece. For the bottom layers of the upholstery batting, which are 40mm thick, you may use multiple pieces if necessary. However, it is crucial to avoid leaving any gaps or hollow spaces to ensure even cushioning and comfort.

We construct the sub-frame using OSB boards with dimensions of 1500mm x 245mm and rails measuring 1350mm and 245mm in length, following the assembly shown in the previously provided illustration.

List of Parts for the Right Frame (All dimensions in millimeters):
Rails (30 x 50):
- For the back: 260mm (2 pieces)
- For the back and storage box: 482mm (6 pieces)
- For the storage box: 678mm (3 pieces), 320mm (2 pieces), 222mm (2 pieces), 252mm (1 piece)
- For the seat: 1250mm (2 pieces)
- Rail (20-30cm in length) for fastening the cardboard
OSB (Oriented Strand Board):
- 210 x 518mm (2 pieces) - Note: These are sawn according to a specific draft and differ from the left part.
- 916 x 282mm (1 piece)
- 690 x 282mm (1 piece)
- 678 x 282mm (1 piece)
- 1590 x 282mm (1 piece)
- 180 x 282mm (1 piece)
- 350 x 482mm (1 piece)

Cardboard:
- For the back: 510 x 90mm (1 piece), 510 x 360mm (1 piece)
- For the storage box: 675 x 247mm (1 piece), 1555 x 675mm (1 piece) - Note: These are sawn according to a specific draft and differ from the left part.

Plywood: 15mm thick

Foam Rubber: 100mm (constructed from layers of 2x40mm and 20mm)

Foam rubber, 20mm: 515x530mm (1 piece, for the back)

Assembly Instructions:
Joining OSB and Plywood: Attach the OSB pieces (1590x282mm and 916x282mm) using a plywood lap.

Creating Semi-Products: Form two semi-products using OSB pieces (678x282mm and 482x350mm), as illustrated at the top of the drawing.

Utilize OSB (180x282mm), rail (252mm), and rail (678mm) for this step.
-


Installing Support Rails: Secure rails around the perimeter; these will serve as support for the bottom of the storage box. These rails are represented in darker colors in the drawing.

Attaching Cardboard: Affix the cardboard to form the bottom

Attach the 675x247mm cardboard part

Assembling the Back: Combine rails of lengths 260mm (2 pieces) and 482mm (3 pieces) to construct the back. Proceed to affix cardboard and adhere foam rubber.

Strengthening Plywood: To prevent deformation, reinforce the plywood with two 1200mm rails, ensuring they are positioned at a minimum of 70mm from the edge of the plywood.

Preparing for Lift Mechanism: Outline and prick holes for the screws that will secure the sofa's lifting mechanism. The specific dimensions will depend on the particular mechanism you acquire. It is recommended to use M6x30 furniture screws. Insert the screws, tap the heads with a hammer, and secure them in place.

 Assembling Foam Rubber Pillow for Seat: Create a layered foam rubber pillow for the seat, adhering it to the frame.


Step 3: Installing the Seat Cushions

Before adhering the foam rubber to the frame, we need to prepare it by smoothing out any sharp edges using a plane or a large file, ensuring a safer and cleaner attachment surface.

We insert the M6 furniture screws, each 35mm in length, into the designated holes.


We designate the positions on the seat and puncture holes with a diameter of 10-12 mm to secure and tighten the fixture.

We trim a single piece of material to create a seat, ensuring its dimensions are 1500 x 740 mm.

Following that, we adhere the second layer using the remaining cut-out pieces. Next, we apply the top layer of 20 mm foam rubber, completing the seat cushion. Once done, we affix the finished cushion onto the frame.
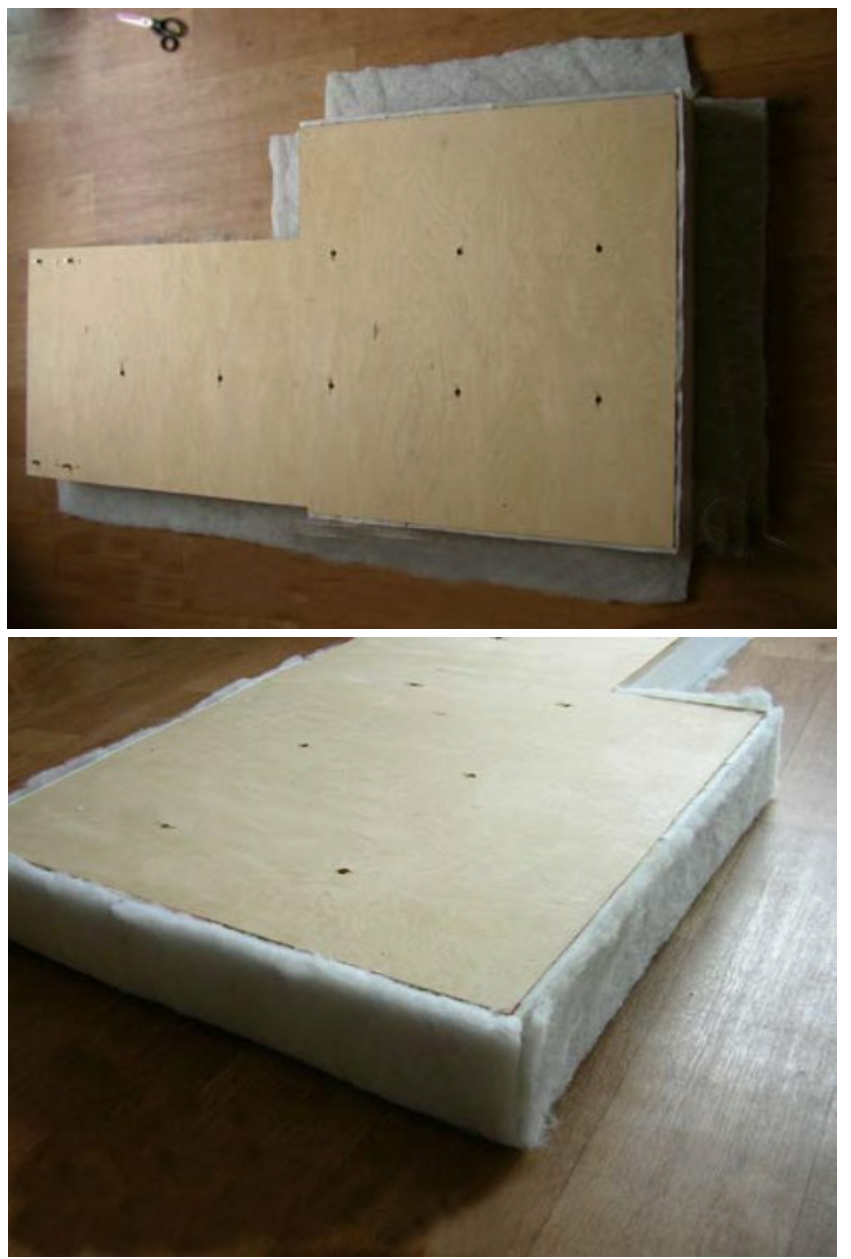
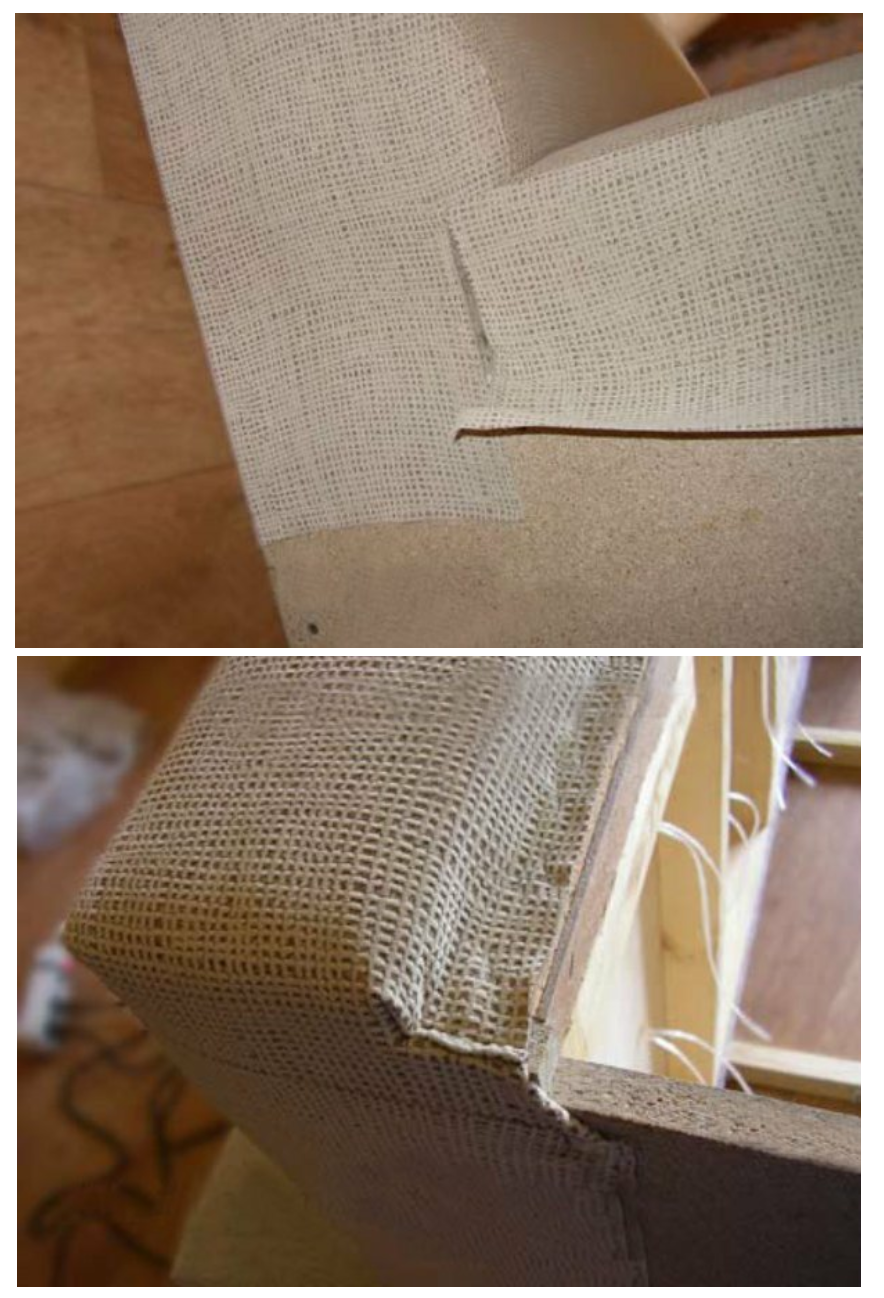
 Creating the cushion for the second seat is a bit more complex. Carefully cut the layers to the exact measurements and then apply adhesive to the bottom side. Attach the seat's plywood on top—recall that we've already secured the sofa's lift mechanism screws and made the necessary holes for tightening. The photo indicates with red lines the edges where the foam rubber should extend 1 cm beyond the plywood. Ensure that the foam rubber aligns with the plywood dimensions everywhere else.

Now, you need to cover the plywood on the sides where the foam rubber extends out. Cut a strip measuring 1 cm x 1.5 cm using scissors, and adhere it to the edge of the plywood.


Lastly, we will demonstrate the method for attaching foam rubber to the sofa's armrest.


Step 4: Secure Cushions & Upholstery
The layout for cutting the sofa fabric is tailored to accommodate fabric that is 1.4 meters wide, a common width for most upholstery fabrics. You will require approximately 10.2 meters of fabric in total. Ensure that you cut the fabric with its wrong side facing up, ready for sofa upholstery. The seam allowances have been set to 1 cm, and this has been incorporated into the cutting plan. On the plan, the parts to be cut out are indicated in pink, while the remaining fabric is shown in grey. Note that the leftover fabric will be needed later on. All measurements provided are in centimeters.

You have the option to create your own templates for parts 14 and 15. Simply place a fabric or paper sheet over the frame, which has already been covered in foam rubber, to trace the shape directly. Alternatively, you can utilize a pre-existing pattern as a guide.


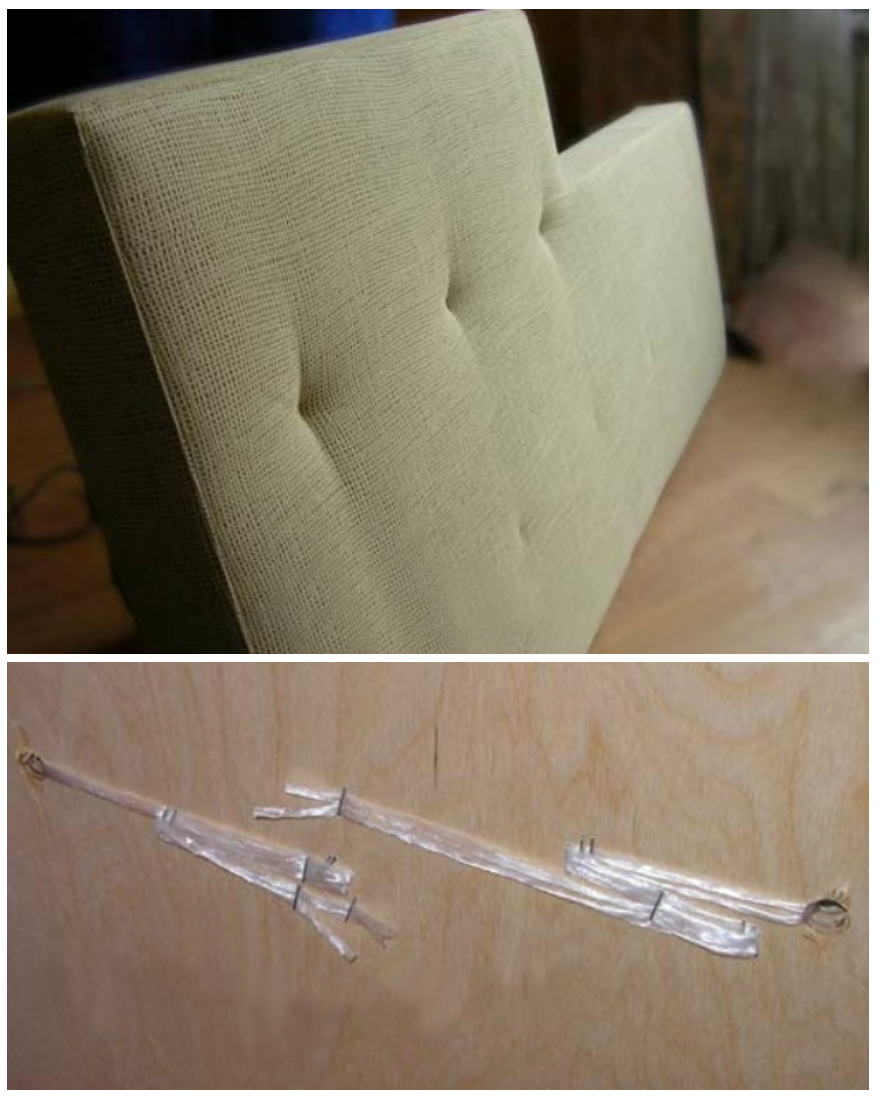
Upholstering the Back Cushion


We attach the padding polyester to the underframe using adhesive or brackets, then proceed to cover it with the fabric.
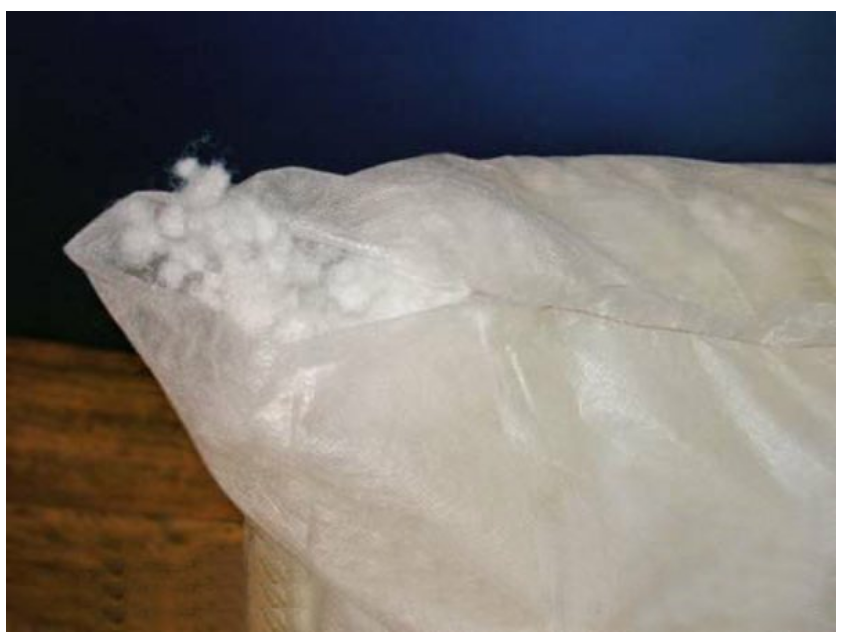
We are going to craft three straightforward rectangular inner covers for pillows, measuring 82cm by 67cm, using a lightweight fabric and fill them with holofiber or another plush stuffing. A total of 4kg of this stuffing material will be required for all three pillows. Alternatively, you can use foam rubber shreds as a filler; however, if you choose this option, it is advisable to add a layer of padding polyester to prevent the pillows from feeling lumpy.
Upholstering the Chaise Sectional
Upholstering the Sofa Seats
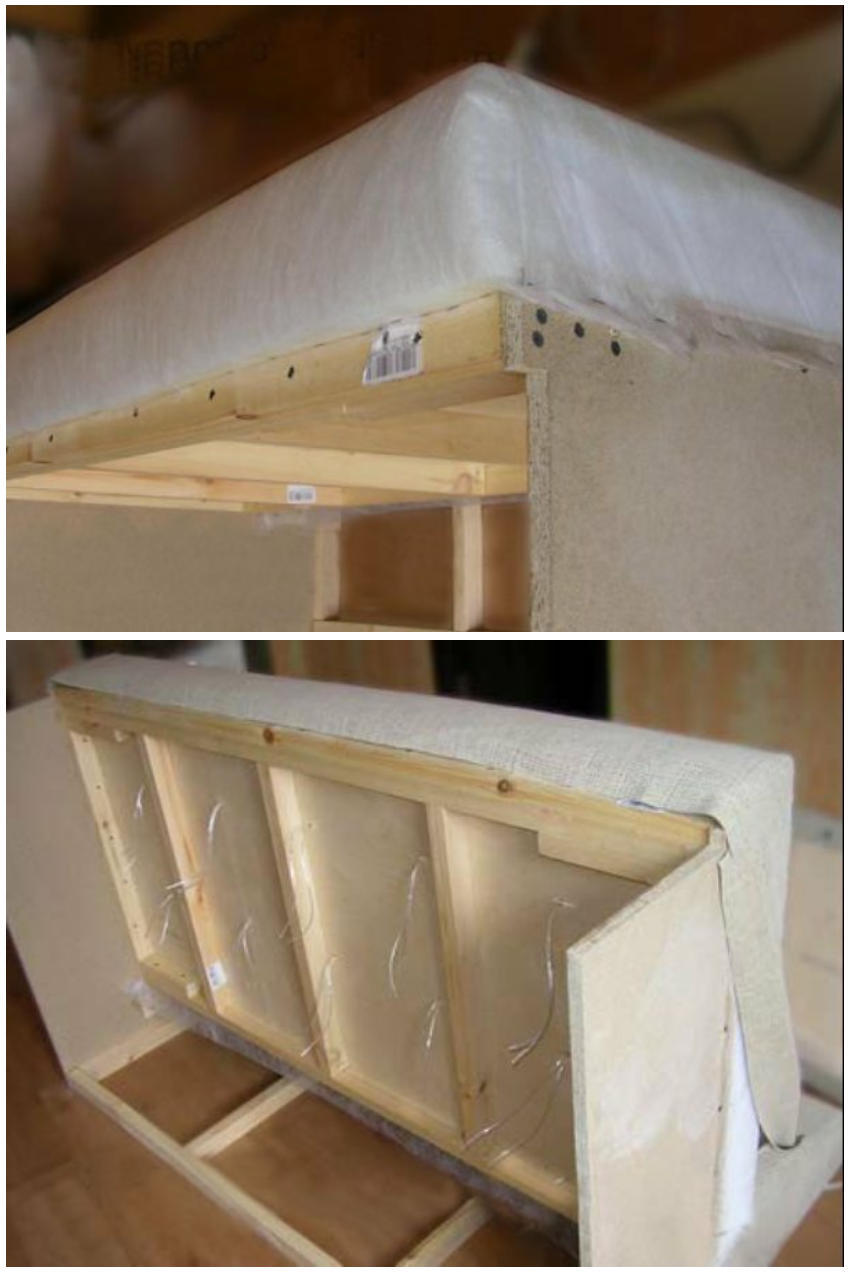
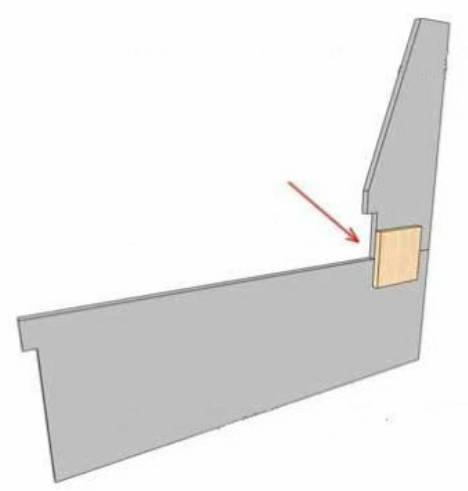
In the following image, an arrow points to a strip of cardboard that I have attached with nails to make up for the shortfall in rail thickness. During the frame assembly, I opted for a rail measuring 45x30 instead of the suggested dimensions of 50x30. This adjustment required the addition of the cardboard strip to balance out the discrepancy.


We affix a 20mm strip of foam rubber.

We secure the fabric to the front part of the seat:

Step 5: Installing the Sofa Legs
We attach the legs, opting for standard plastic legs with a height of 30mm. It’s crucial to note the positioning during installation: a leg should provide support not just for the sofa’s frame, but for the armrest as well.

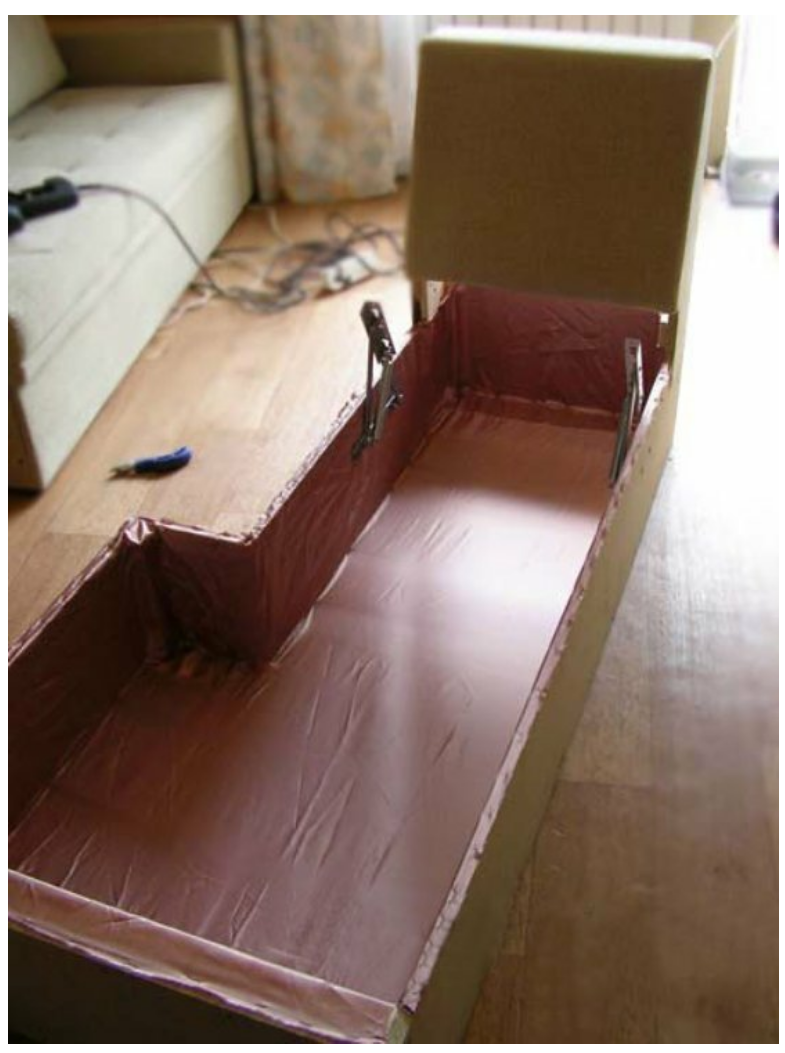
Step 6: Upholstering the Storage Chaise
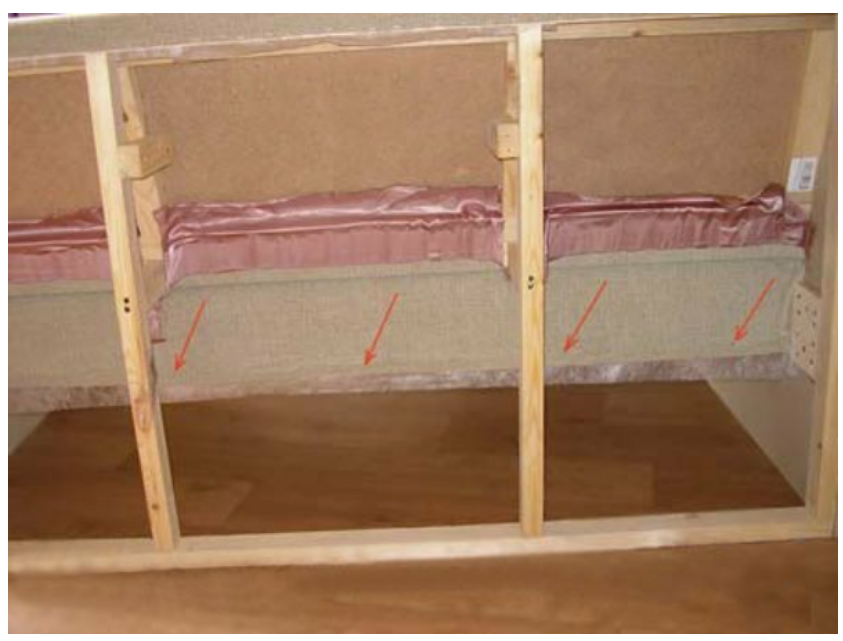
We affix a strip of foam rubber measuring 20mm by 50mm along the upper border, as indicated by the red arrows, to bolster the seat.

We adhere a strip of foam rubber with dimensions of 20mm x 50mm along the top perimeter (as highlighted by the red arrows), creating additional support for the seat.


We secure the cut piece labeled as number 3 in place using a strip of cardboard.

We attach the fabric to the front of the seat and proceed to fix the legs in place.
Step 7: Finish Building the Custom Sofa Sectional

We proceed to install the arm, securing it in place with the furniture screws. To connect the right and left parts of the sofa, we align them precisely next to each other. Next, we choose the desired spot—approximately 100mm from the bottom edge and 150mm from both the front and back edges of the sofa, ensuring these are places we can easily reach. At these locations, we drill two holes through the partitions of both sofa parts and then join them together using two M10 screws, each 50mm in length. For easier access to these spots, it is advisable to drill the holes from the storage box side after securing the fabric lining (if applicable) inside the box with brackets. This helps protect the fabric from getting tangled up in the drill.
The Custom Sofa Chaise Sectional We Built


Purchase a custom L Shaped Couch from What A Room. Handcrafted in the USA and made to order. Using quality kiln-dried solid wood and High resilient foam core.
FAQs About Building a Custom Couch
How do you build a custom couch step by step?
Building a custom couch involves creating a sturdy wooden frame, attaching support beams, adding legs, and then wrapping it with foam and upholstery fabric. Our step-by-step DIY sofa guide covers all the tools and materials you’ll need.
Is it cheaper to build a couch or buy one?
A DIY custom couch can cost anywhere from $300–$800 in materials, depending on fabric and foam. Buying a handcrafted sofa may cost more upfront but offers professional construction, warranty, and long-lasting comfort.
What kind of wood is best for a sofa frame?
Hardwoods like alder, maple, or oak are best for building a durable custom couch frame. Pine and plywood are budget-friendly but may not last as long under heavy daily use.
How much fabric do I need to upholster a custom sofa?
Most 3-seat sofas require 12–16 yards of fabric. Sectionals or deep sofas can require 20+ yards. Always choose performance or stain-resistant fabrics if you have kids or pets.
Can I build a sectional sofa at home?
Yes! Building a sectional sofa is similar to a regular couch but requires multiple seat frames joined together. Our DIY sectional sofa guide explains how to create modular pieces for flexible layouts.
How long does it take to build your own couch?
On average, a DIY sofa project takes 2–4 days, depending on your tools and skill level. Upholstery is the most time-consuming step, especially for larger sectionals.
What’s the best foam for sofa cushions?
High-density foam (2.5 lb or higher) is recommended for DIY custom couch cushions. For added comfort, wrap foam with Dacron or opt for Trillium fills for a softer, down-like feel.
